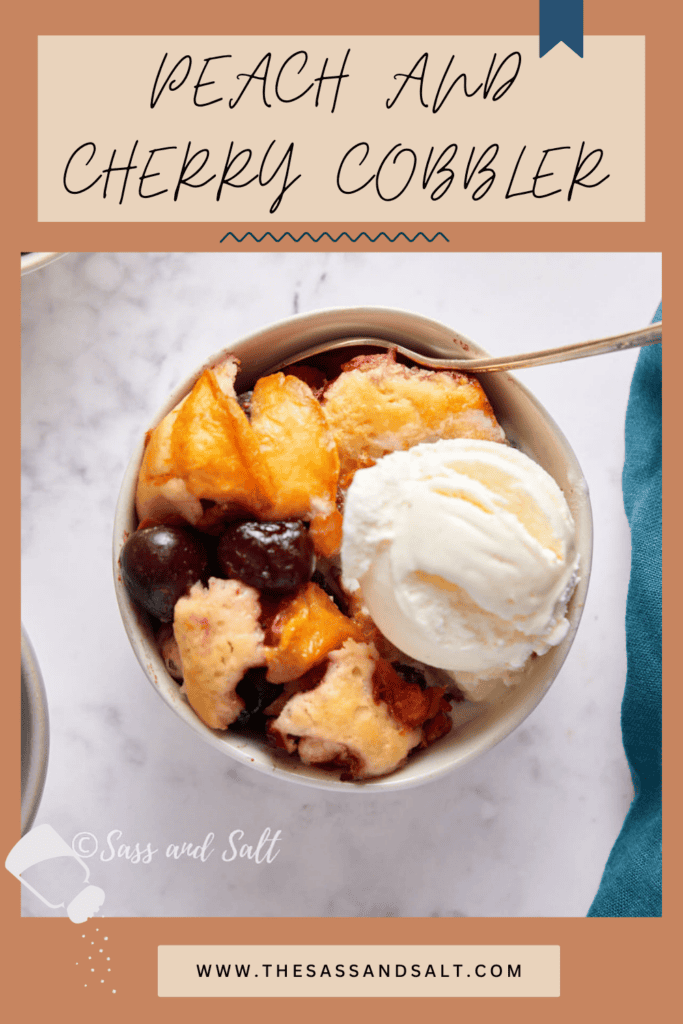
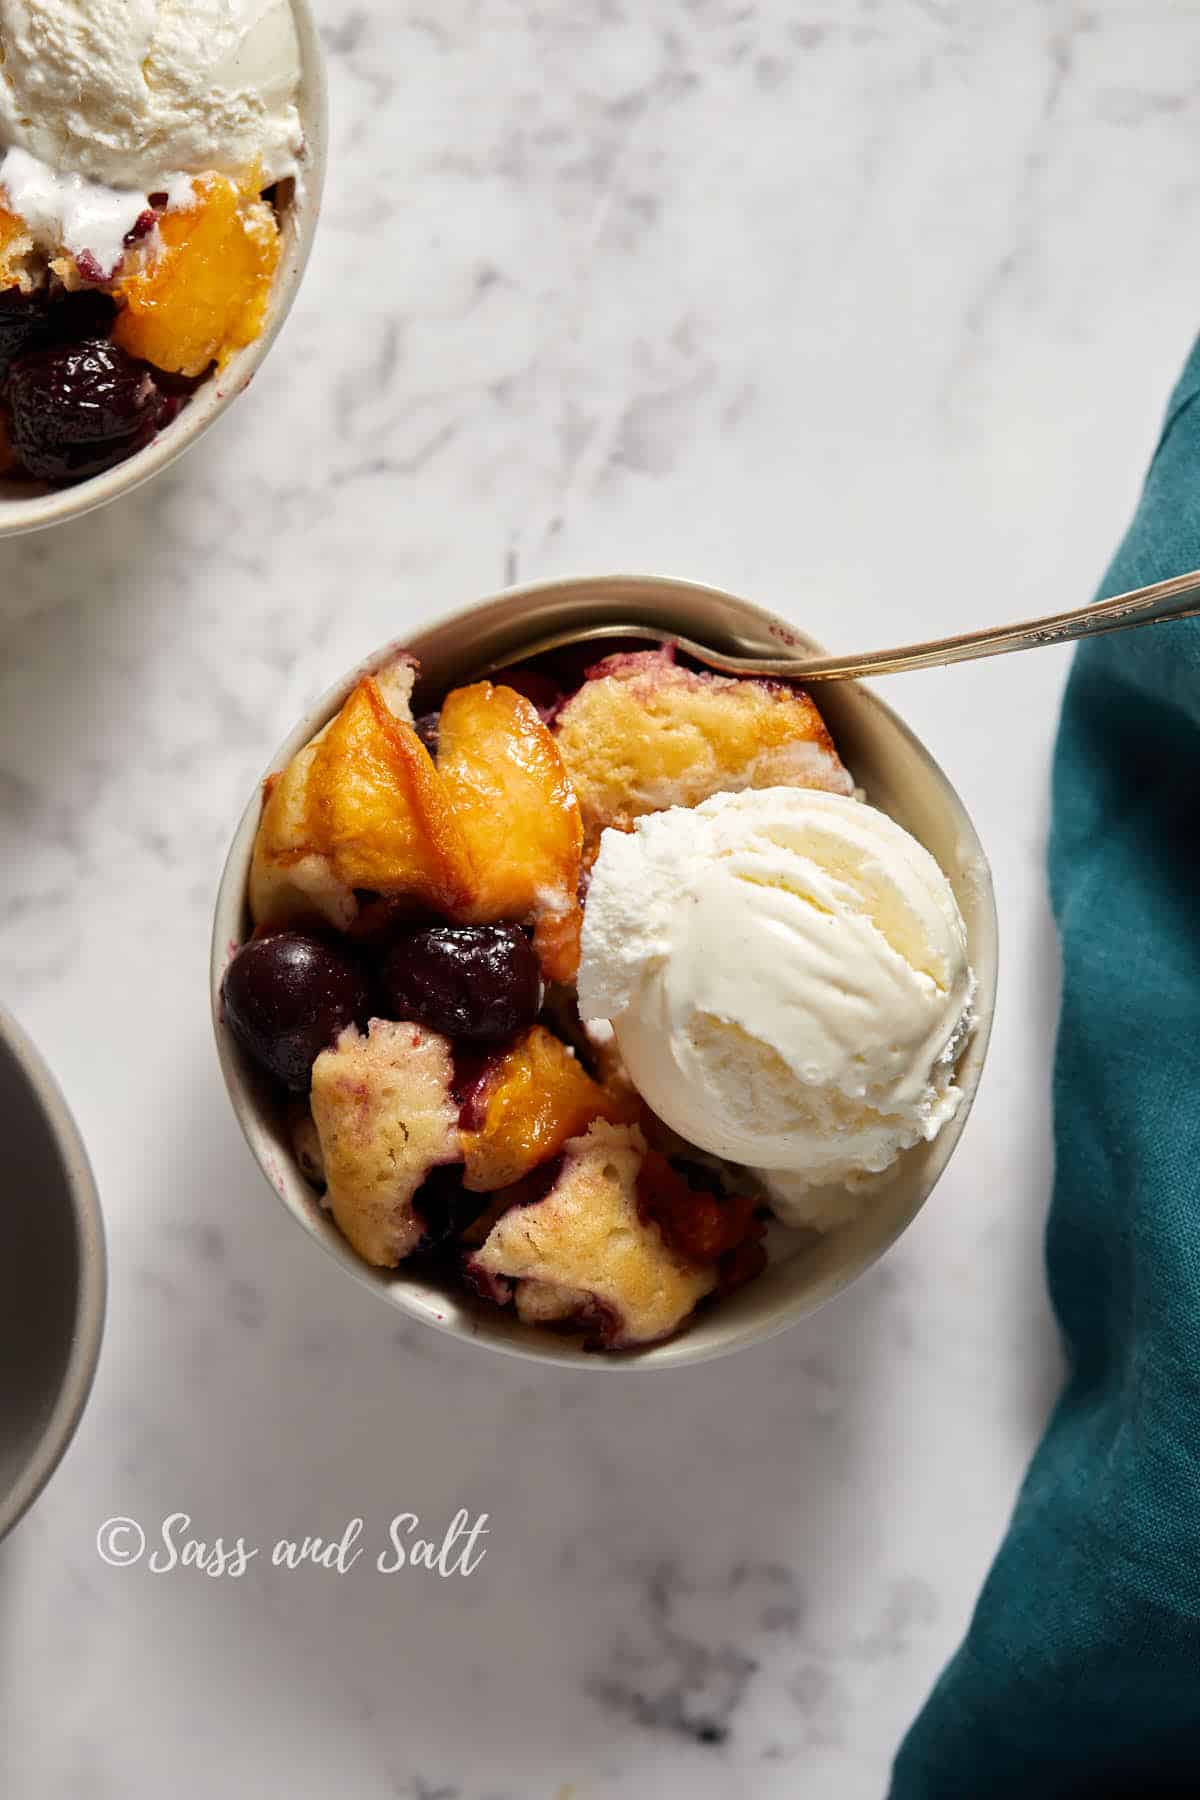
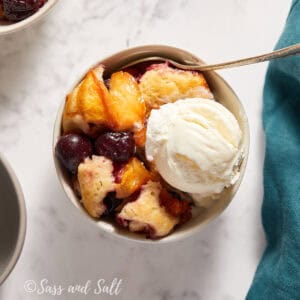
This cherry and peach cobbler isn’t the biscuit-topped kind. It’s the cake-batter style, you pour the batter into a dish of melted butter, pile the fruit on top, and the batter rises up around it as it bakes, leaving chewy, buttery edges and soft pockets of cake between the fruit. I cross-tested a handful of cobbler methods before landing here, and this is the one that earned a permanent spot in my summer rotation.
Save this Recipe!
The fruit is the same combo I love in my peach cherry crisp, sweet peaches and tart cherries, and I make it with frozen fruit more often than fresh. After years reading produce data as a grocery category manager, I’ll tell you the freezer usually wins on stone fruit: cherries especially are picked and frozen at peak ripeness, while most grocery fresh ones are firm and underripe. Just thaw and drain well, or the cobbler turns out soggy.
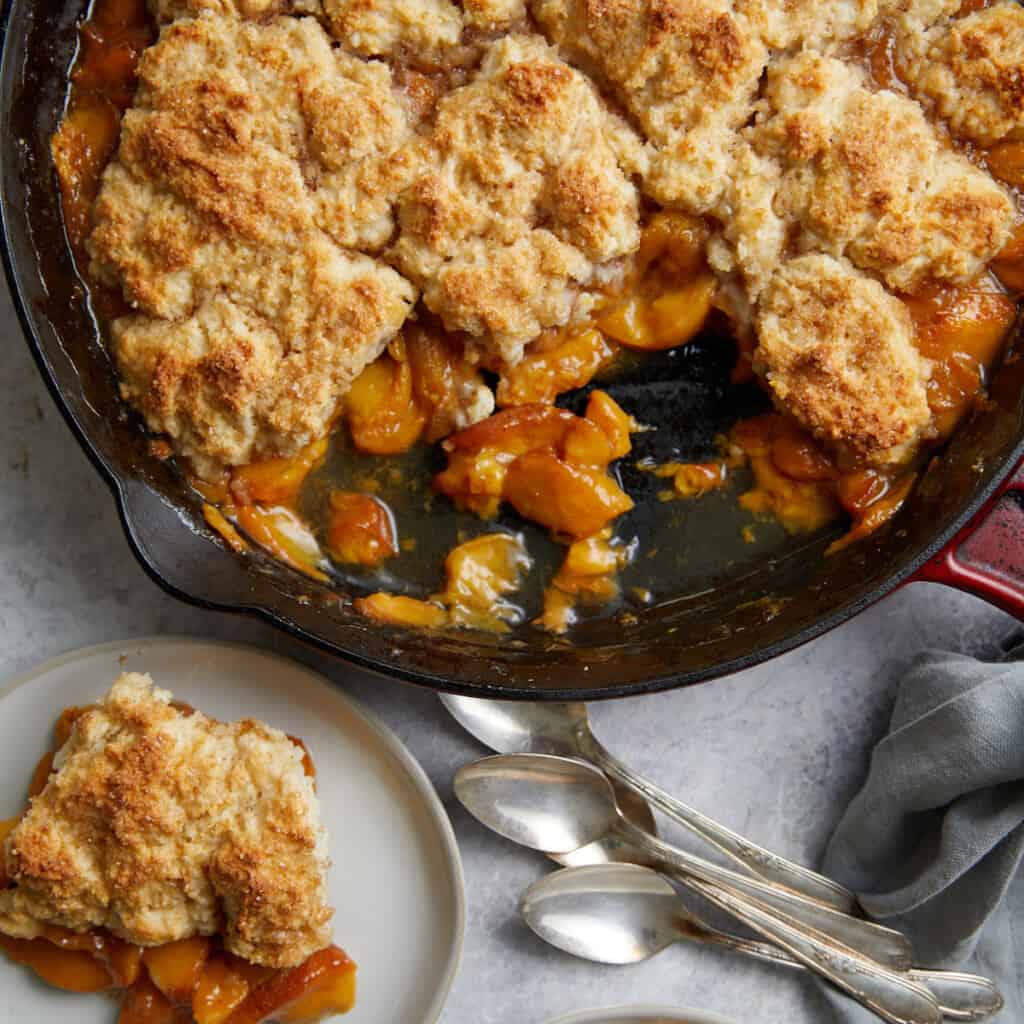
It’s our go-to for the 4th of July, BBQs, and Father’s Day, but the frozen-fruit option means I make it year-round. If you want the crackly-edged skillet version instead, try my cast iron peach cobbler.
Why You’ll Love This Recipe
- No biscuit dough, no rolling. One bowl of batter, melted butter, fruit on top, the oven does the shaping.
- Buttery cake edges. The batter climbs the sides as it bakes for chewy, golden corners everyone fights over.
- Fresh or frozen, any season. Built for frozen stone fruit, so it’s not a six-week-a-year recipe.
- The freezer secret. Frozen cherries bring more flavor than most grocery fresh, and they come pitted.
- Crowd-friendly. A 9×13 feeds a cookout; it’s a 4th of July and Father’s Day regular here.
Do peaches and cherries go together?
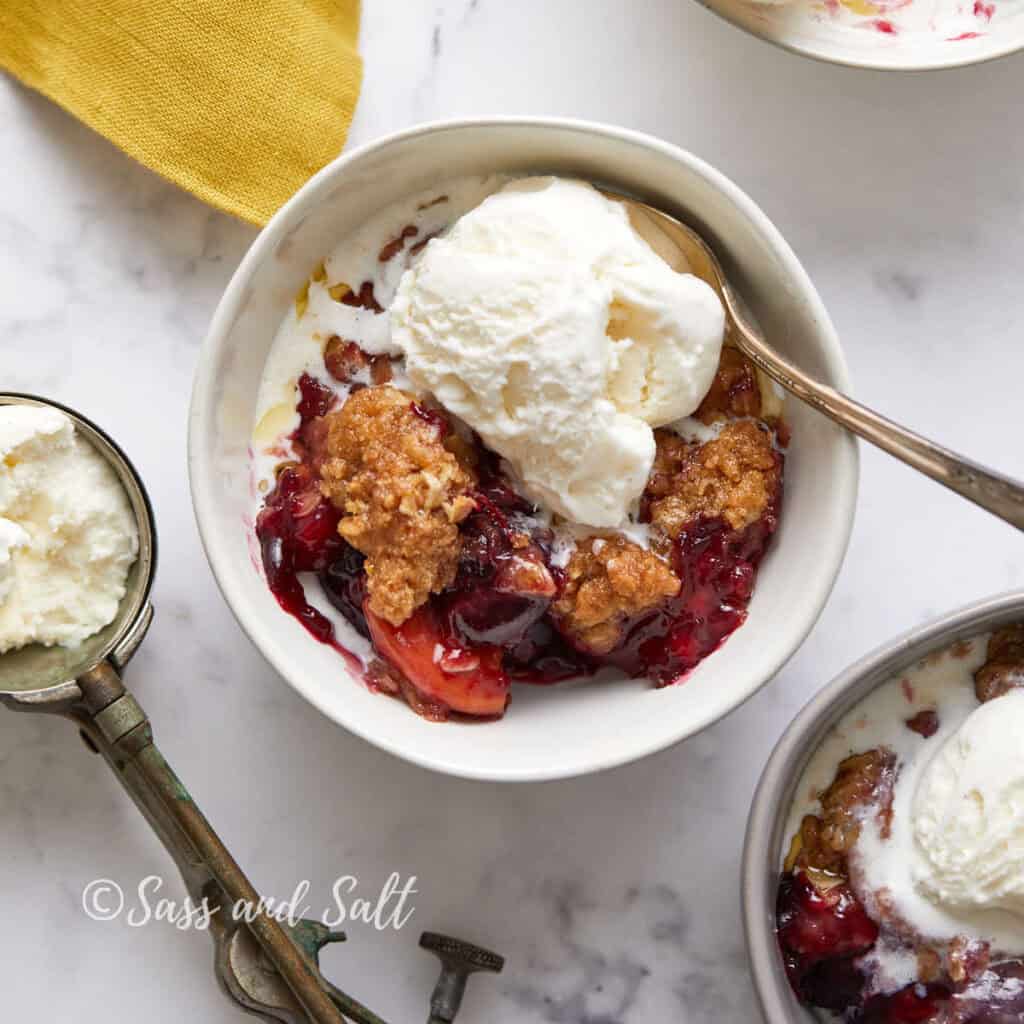
Yes, and it’s one of my favorite stone-fruit pairings. Peaches lean sweet and floral, and tart cherries cut right through that with a little acidity, so the filling tastes balanced instead of one-note. Vanilla and a pinch of cinnamon bridge the two. The combo just works, whether you top it with a biscuit, an oat crumble, or this cake-like batter.
Ingredients

- Peaches – Fresh or frozen both work. I use frozen ones I sliced and froze from our local farm. Just thaw and drain them well so the cobbler doesn’t go soggy. (If fresh peaches need ripening, here’s how from Serious Eats.) Cherries – Fresh or frozen. I reach for dark frozen cherries since the fresh season is short and they come already pitted. Pit and halve fresh ones if you use them.
- Unsalted Butter – It melts right into the hot baking dish, which is what gives the cobbler its buttery, crisp edges. Don’t stir it into the batter. The layers are the whole trick.
- Baking Powder – The lift that makes the batter rise up and around the fruit for that cake-like topping. Check that yours is fresh.
- Whole Milk – Adds moisture and richness to the batter. Whole milk gives the best flavor and texture here.
See recipe card below for quantities.
Substitutions and Variations
- Fresh or frozen fruit – Both work for the peaches and cherries. If you use frozen, thaw and drain it really well, and discard the liquid, or the batter turns soggy.
- Switch up the fruit – Add or swap blackberries, blueberries, raspberries, plums, or nectarines, or go all-peach or all-cherry. Just keep the total fruit about the same amount.
- Add a crunchy top – Sprinkle a little turbinado sugar or chopped pecans over the batter before baking for a crackly, golden finish.
- Change the flavor – A little cinnamon, cardamom, almond extract, or citrus zest all pair beautifully with the stone fruit.
- Make it gluten-free or dairy-free – Use a 1:1 gluten-free baking flour, or swap in vegan butter and a non-dairy milk like oat.
I’ve made the fresh-and-frozen version myself. The other swaps are ideas I’d happily try, but haven’t tested in this exact recipe yet. If you run with one, tell me how it turned out in the comments!
How to make Cherry and Peach Cobbler

Macerate the fruit. Toss the peaches and cherries with ⅓ cup of the sugar and let them sit while you work.
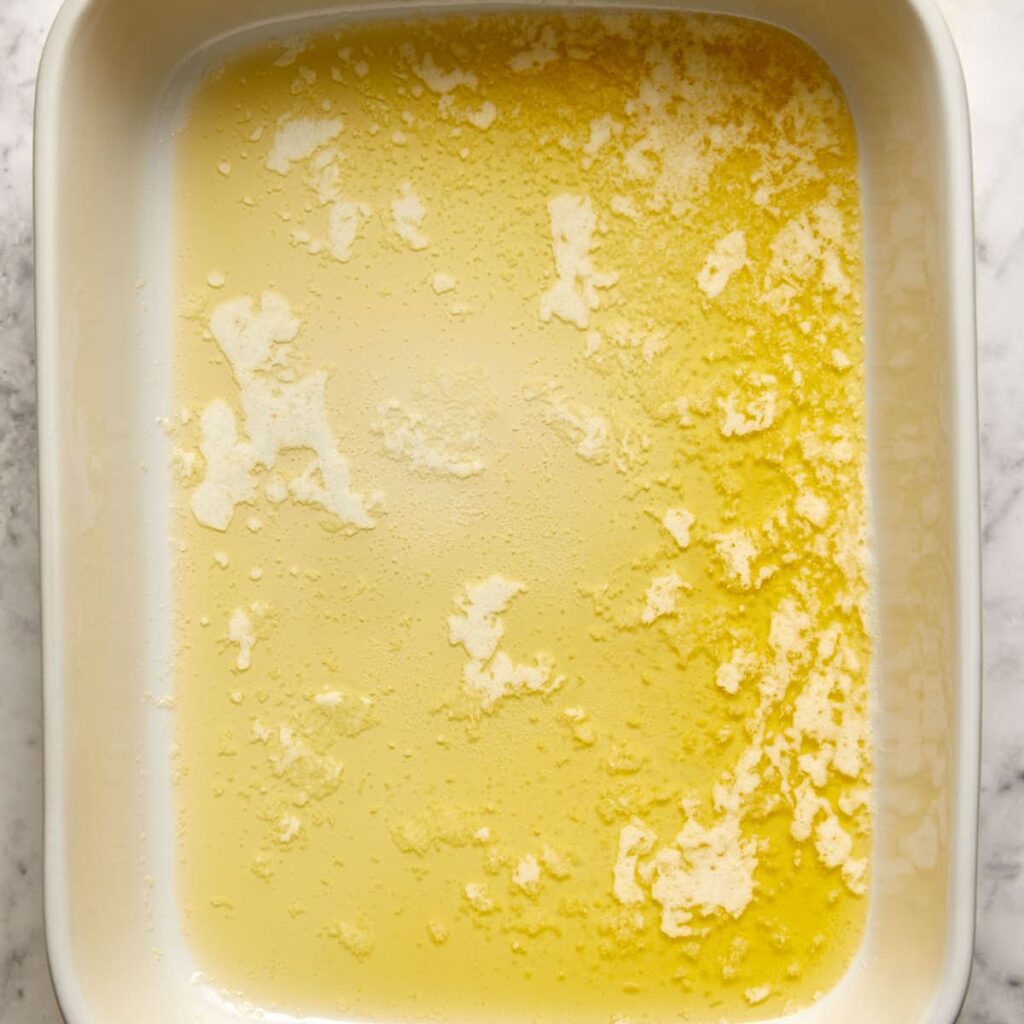
Melt the butter. Put the butter in your 9×13 dish and melt it in the oven, about 10 minutes.
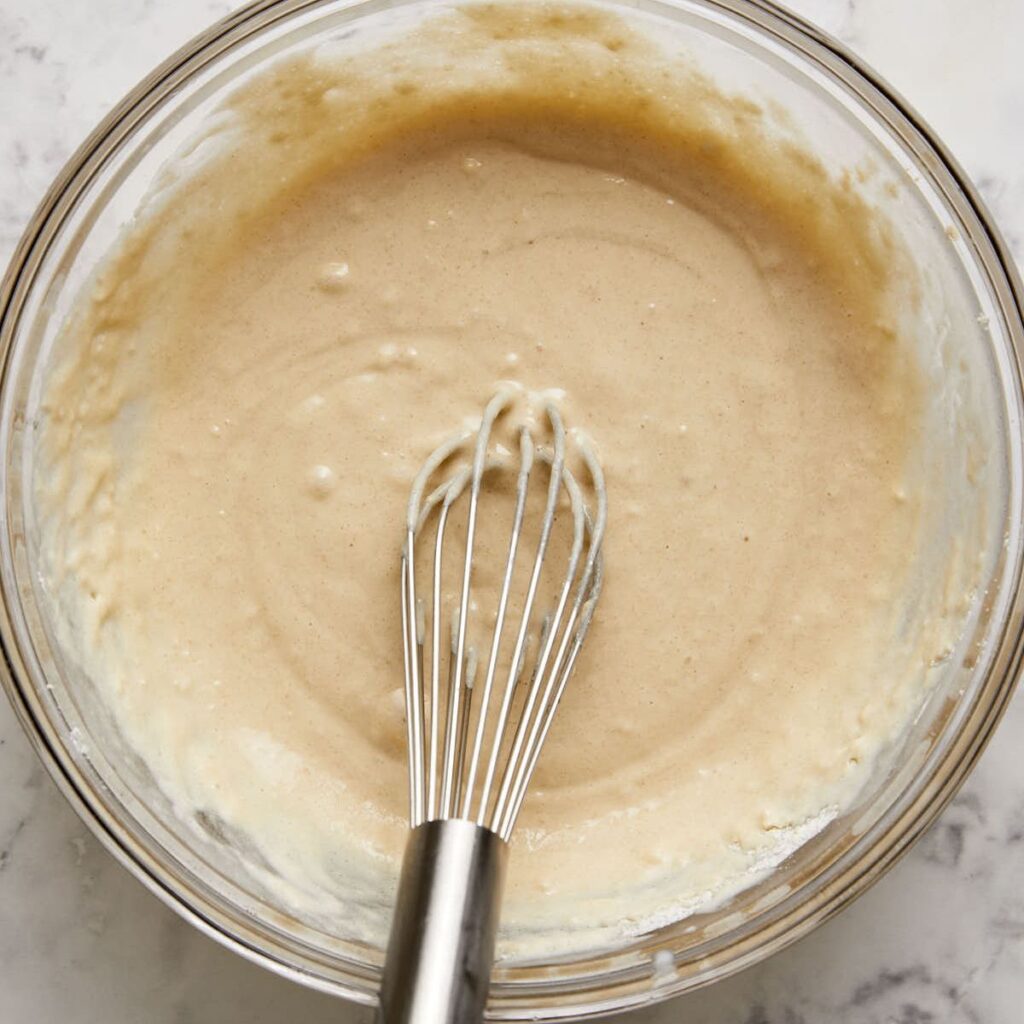
Mix the batter. Whisk the flour, baking powder, salt, and the remaining sugar. Stir in the milk and vanilla just until combined. Lumps are fine, don’t overmix.
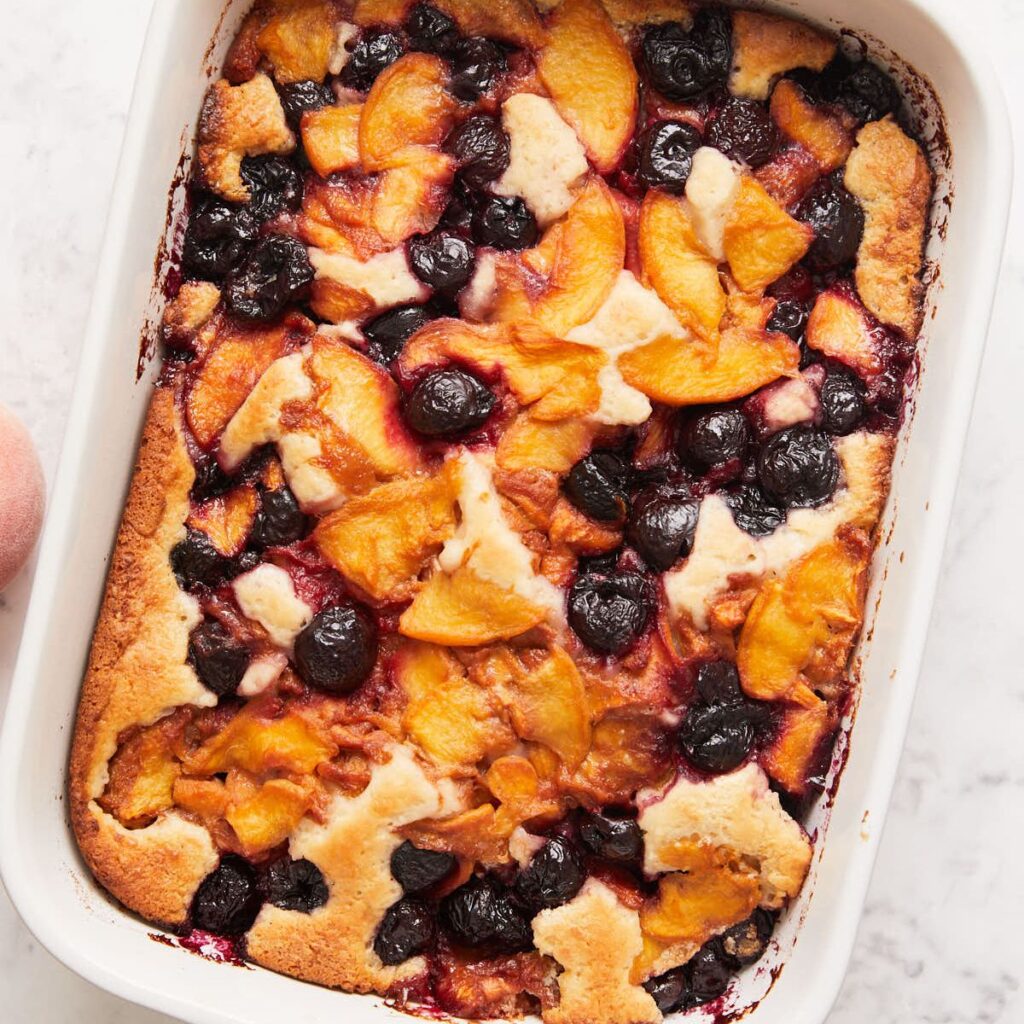
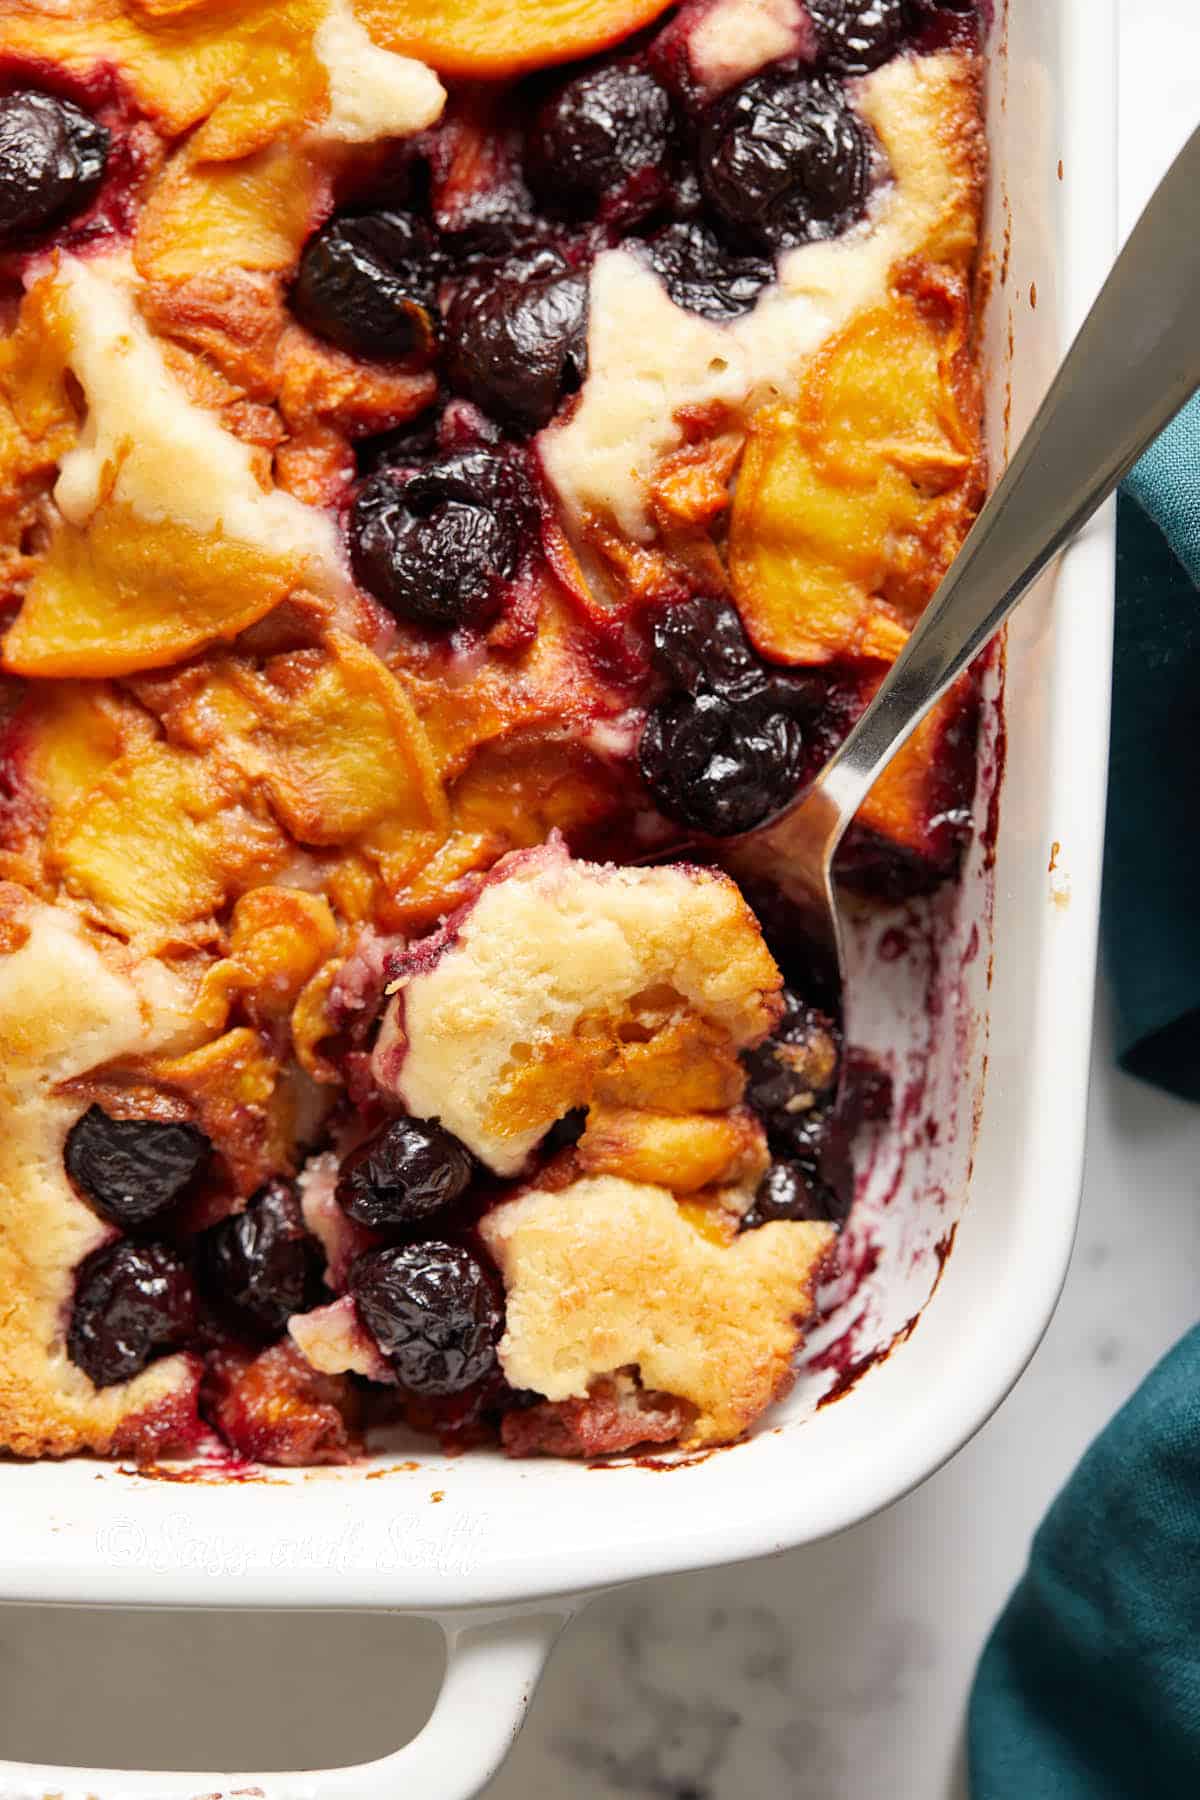
Layer and bake. Pour the batter over the melted butter without stirring. With a slotted spoon, spoon the fruit over the batter, leaving the pooled liquid behind. Bake 55 to 60 minutes, until the top is golden and the fruit bubbles. Rest 15 minutes before serving.
Sarah’s Tips
- Don’t stir the layers. Batter on the bottom, butter underneath, fruit on top. As it bakes, the batter rises up through the butter and around the fruit, and that’s what gives you those buttery edges.
- Butter floating partway through? Leave it. It reabsorbs into the cobbler by the end of baking.
- Drain the fruit well. This cobbler has no cornstarch, so draining the macerated fruit is the only thing keeping the batter from going soggy. Thaw and drain frozen fruit, and leave the pooled liquid behind when you spoon it on.
- Use the right pan. A 9×13 dish or a large cast iron skillet gives the fruit room. Too big spreads it thin, too small can overflow.
FAQ’S
Storage
- Refrigerate. Cool the cobbler completely, then cover it tightly or move it to an airtight container. It keeps for 3 to 4 days.
- Reheat. Warm it in a 350°F oven for 15 to 20 minutes to bring back the edges. A microwave works for a quick single serving but won’t crisp them.
- Freeze. Wrap tightly in plastic and foil, or use a freezer-safe container, for up to 3 months. Thaw overnight in the fridge and reheat in the oven.

Thank you!
If you tried these, I want to hear about it, by leaving a comment below and ⭐⭐⭐⭐⭐. It makes my day to see your kitchen wins.
Tag me on Social!
Instagram | Facebook | Pinterest
See you next time! ♡ Sarah
Recipe
Cherry and Peach Cobbler
Equipment
- 9×13 inch ceramic baking dish or large cast iron skillet
Ingredients
- 2 cups fresh or frozen peaches thawed and drained, if frozen
- 2 cups fresh or frozen cherries thawed and drained, if frozen
- 1 cup (200g) granulated sugar, divided
- 9 tablespoons (127g) unsalted butter
- 1½ cup (213g) all-purpose flour
- 2½ teaspoons baking powder
- 1¼ cup (300ml) whole milk
- 2 teaspoons vanilla extract
- 1/2 teaspoon (2g) Diamond Crystal kosher salt; for table salt, use about half as much by volume or the same weight
Instructions
- Set your oven to 350°F (177°C).
- In a large bowl, combine the peaches and cherries with 1/3 cup (67g) of granulated sugar. Allow the mixture to sit and macerate.
- Place the 9 tablespoons of butter in a 9×13-inch baking dish. Put the dish in the preheated oven and let it melt for about 10 minutes.
- While the butter is melting, in a medium mixing bowl, whisk together all-purpose flour, baking powder, salt, and the rest of the sugar (2/3 cup (134g)).
- Add milk and vanilla extract to the dry ingredients, stirring until just combined.
- Carefully remove the hot baking dish with melted butter from the oven. Pour the batter evenly over the melted butter.
- Using a slotted spoon, layer the macerated peaches and cherries over the batter. Discard any remaining liquid in the bowl.
- Place the dish back in the oven and bake for 55 to 60 minutes, until the batter is golden brown and the fruit juices are bubbling.
Save this Recipe!
Notes
Optional – Serve with Ice Cream: Serve warm, with a scoop of vanilla ice cream on top. Butter Appearance: If you see butter floating on top during the baking process, do not worry. It will reabsorb into the cobbler towards the end of baking. Baking Dish Alternative: A large cast-iron skillet can be used if you lack a traditional baking dish. Make Ahead? I don’t typically recommend mixing the batter ahead, as that can affect its hydration and rise. About this recipe: I developed this version by cross-testing several published cake-batter cobblers at different butter-to-batter ratios, then dialed in the fruit and sugar for the peach-cherry combo. The melted-butter, batter-on-the-bottom method is a Southern classic, and this is my tested take on it.